Label Format |
  
|
Label Format |
|
Follow the instructions here to customize the label format.
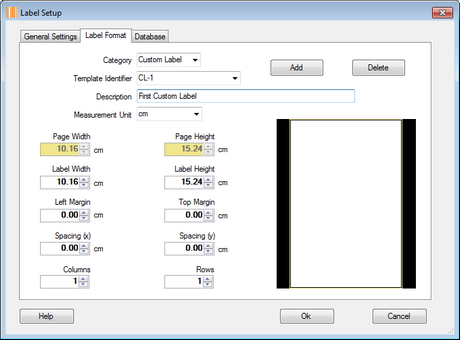
1)Inside the "Label Format" tab, you may pick a pre-defined label template or create a custom label template by clicking the "Add" button.
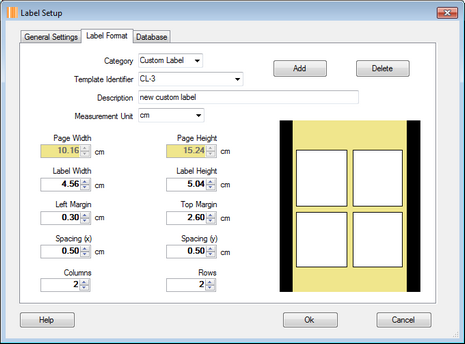
2)Enter a description and pick a page size option for the newly created custom label template.
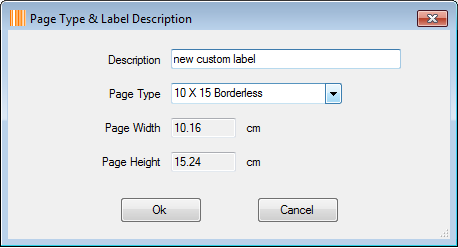
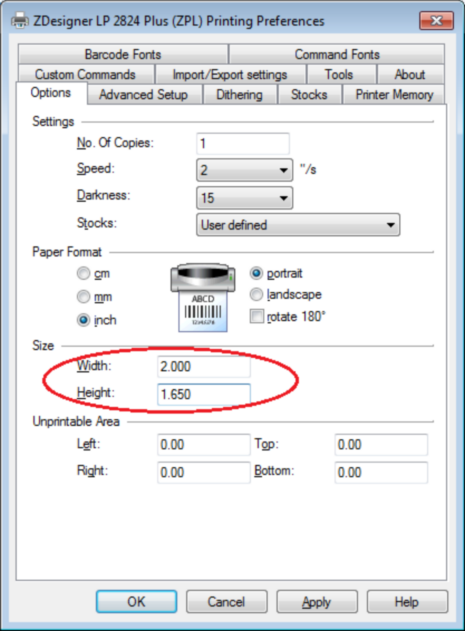
3)You may choose a custom page size instead of a pre-defined page size, this feature is very convenient for printing continuous roll labels. For example, the width and height of each label are 2 inches and 1.5 inches respectively, the space between 2 adjacent labels is 0.15 inch, so the page size is 2 inches X 1.65 inches, choose the "Custom Size" option, which is the last one, from the "Page Type" drop-down list, enter 2.000 and 1.650 into the "Page Width" and "Page Height" fields, and then click the "Ok" button.

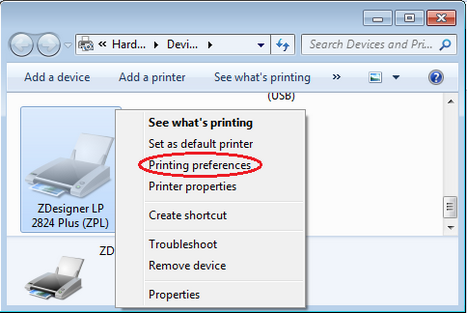
4)In order to print labels correctly, please configure the selected printer's settings to use correct page width and height. Click the "Start" button > "Devices and Printers", right-click the selected printer, and then click the "Printing preferences", change the size by entering correct values there, in this case, they are 2.000 and 1.650 respectively.
5)You may change the values for "Label Width", "Label Height", "Left Margin", "Top Margin", "Spacing (x)", "Spacing (y)", "Columns" and "Rows" to meet your labeling requirements, you may also choose a different option for the "Measurement Unit" or change the "Description" by entering a new value and pressing the Enter key. If you use continuous roll labels, set both "Columns" and "Rows" to 1.