Edit A Print Control |
  
|
Edit A Print Control |
|
Follow the instructions listed below to edit a print control
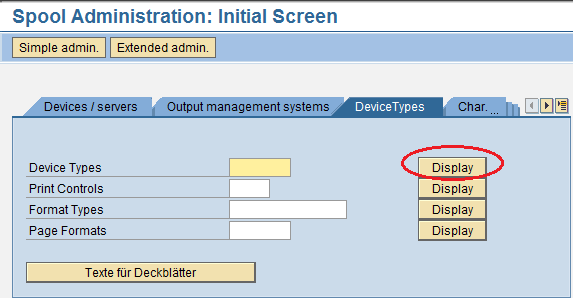
(1) Start transaction SPAD.
(2) Click "Full administration" button > click "DeviceTypes" tab, click "Display" button to choose your device type (e.g. YSWIN).
(3) Click "Print controls" tab > click "Change" icon, enter a control character sequence (e.g. bC=128,B=60,H=15,A=0,P=0,R=0,FS=16,D=) to define a print control, in this case, it is SBP29.
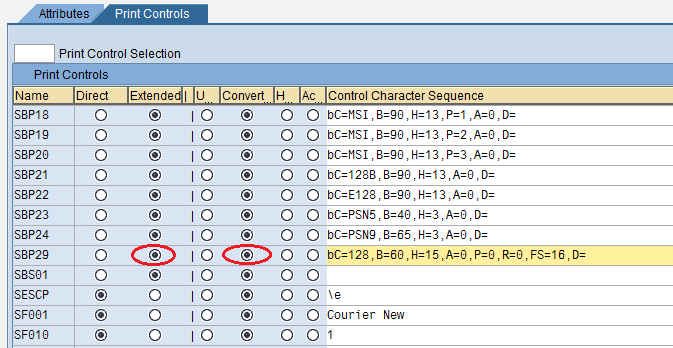
•For print-control prefix (e.g. SBP29), ensure that "Extended" and "Converted" radio buttons are clicked, if "Direct" radio button is clicked instead, SAP ERP will not be able to print barcodes.
•For print-control suffix SBS01:
✓For SAP 4.6, ECC 5.0 or ECC 6.0, ensure that "Extended" and "Converted" radio buttons are clicked and "Control Character Sequence" field is empty.
✓For SAP 4.7, ensure that "Direct" and "Hex" radio buttons are clicked and 1B is entered in the "Control Character Sequence" field.
(4) Save all settings by clicking ![]() icon.
icon.
(5) Hit ![]() a few times until you can see the main menu window.
a few times until you can see the main menu window.